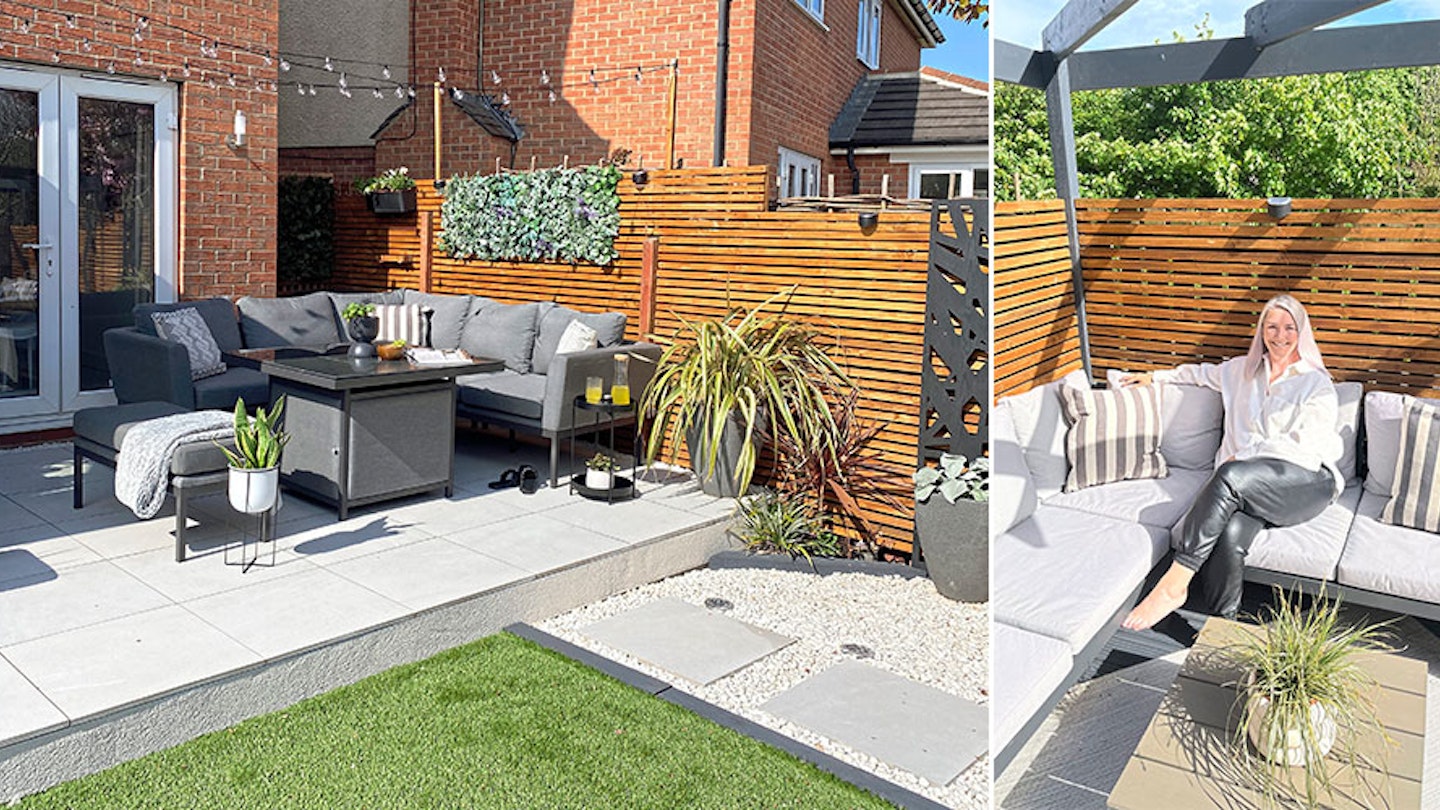
Want to know how you can DIY a Japandi-style garden, on a budget? You've come to the right place! Here Ashley Rack shares her know-how, tips and hacks for doing just that.
Ashley has always been a DIY lover, from helping her dad as a child to single-handedly renovating her first house then, most recently, taking on a full garden redesign and construction. “I’m a very practical person,” she says. “I love challenging myself and nothing fazes me. Why pay someone to do the work when you could have a go yourself?”
It’s that can-do attitude that’s transformed her Sunderland spot from a bare back lawn to the striking space it is today. The PE teacher was undaunted by the plot’s uneven gradient, lack of plants, and even her husband’s reluctance to get stuck in. “Russell hates DIY almost as much as I love it!” she laughs. “He was happy for me to crack on, and made good cups of tea. He appreciates my hard work, and I get to feel smug when I tell him how much cash I saved us!”
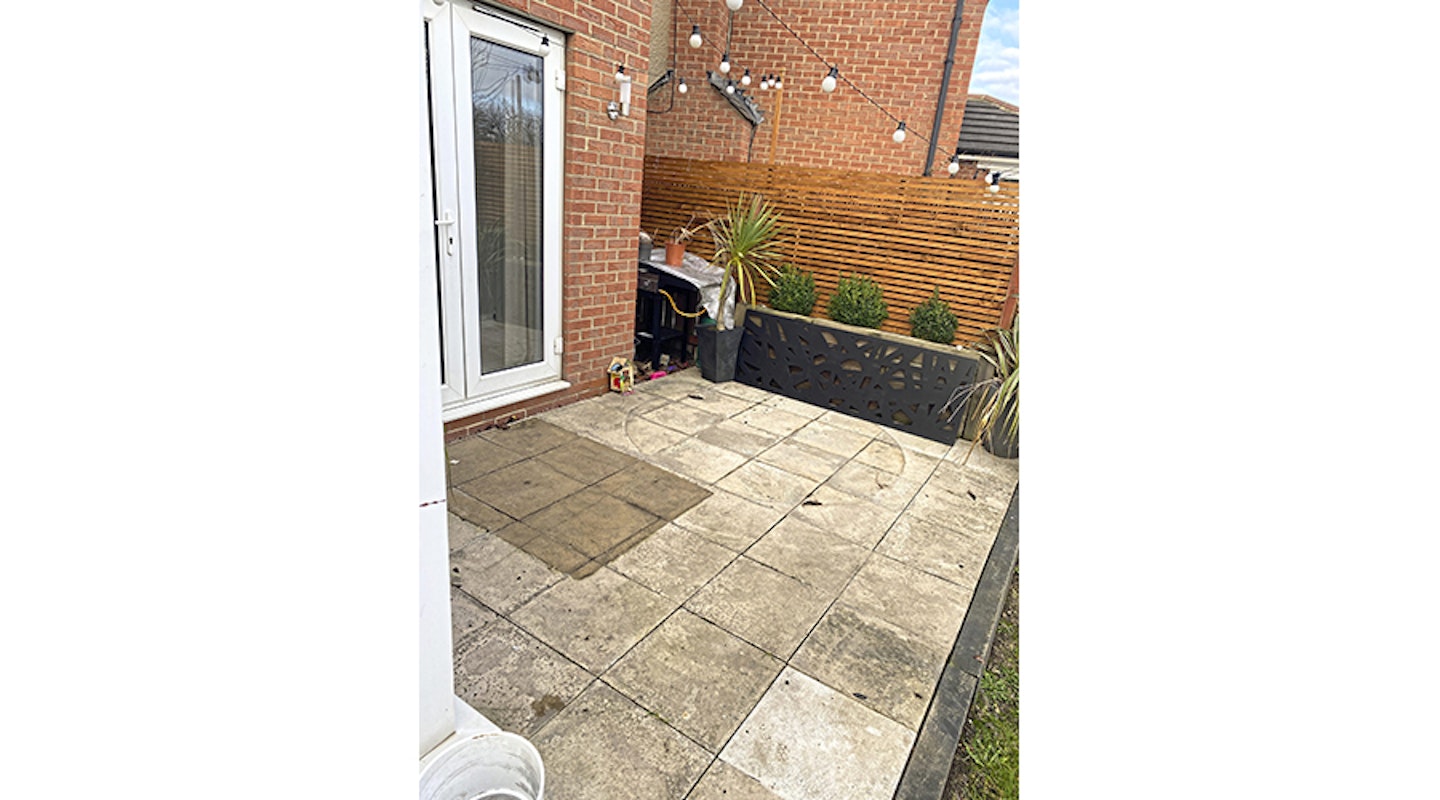
BEFORE: Even the task of lifting all these old patio slabs failed to faze Ashley!
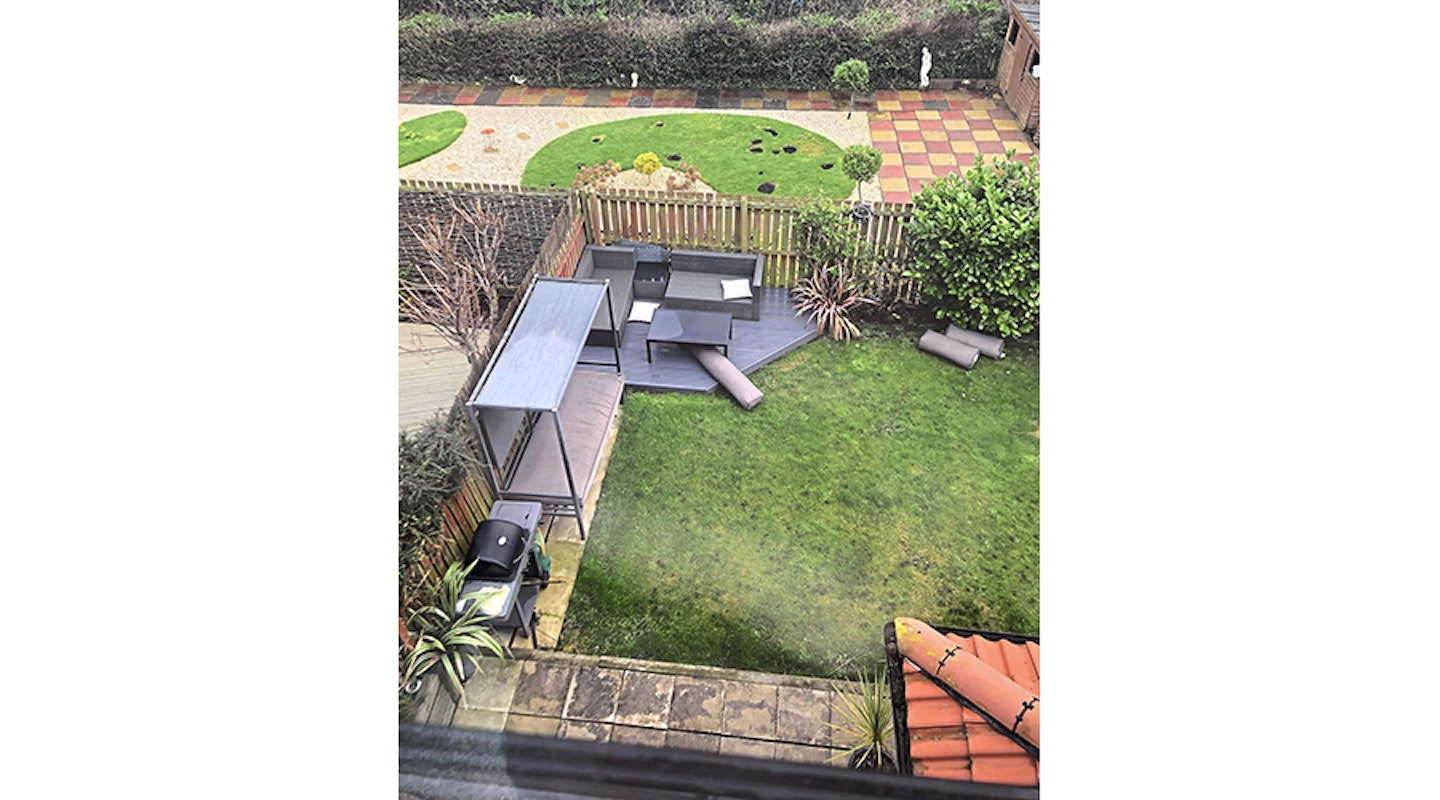
Pre-glow-up the bird’s eye view did nothing but ruffle Ashley’s feathers.

AFTER: Now it’s a welcome sight and a real feather in her DIY cap!
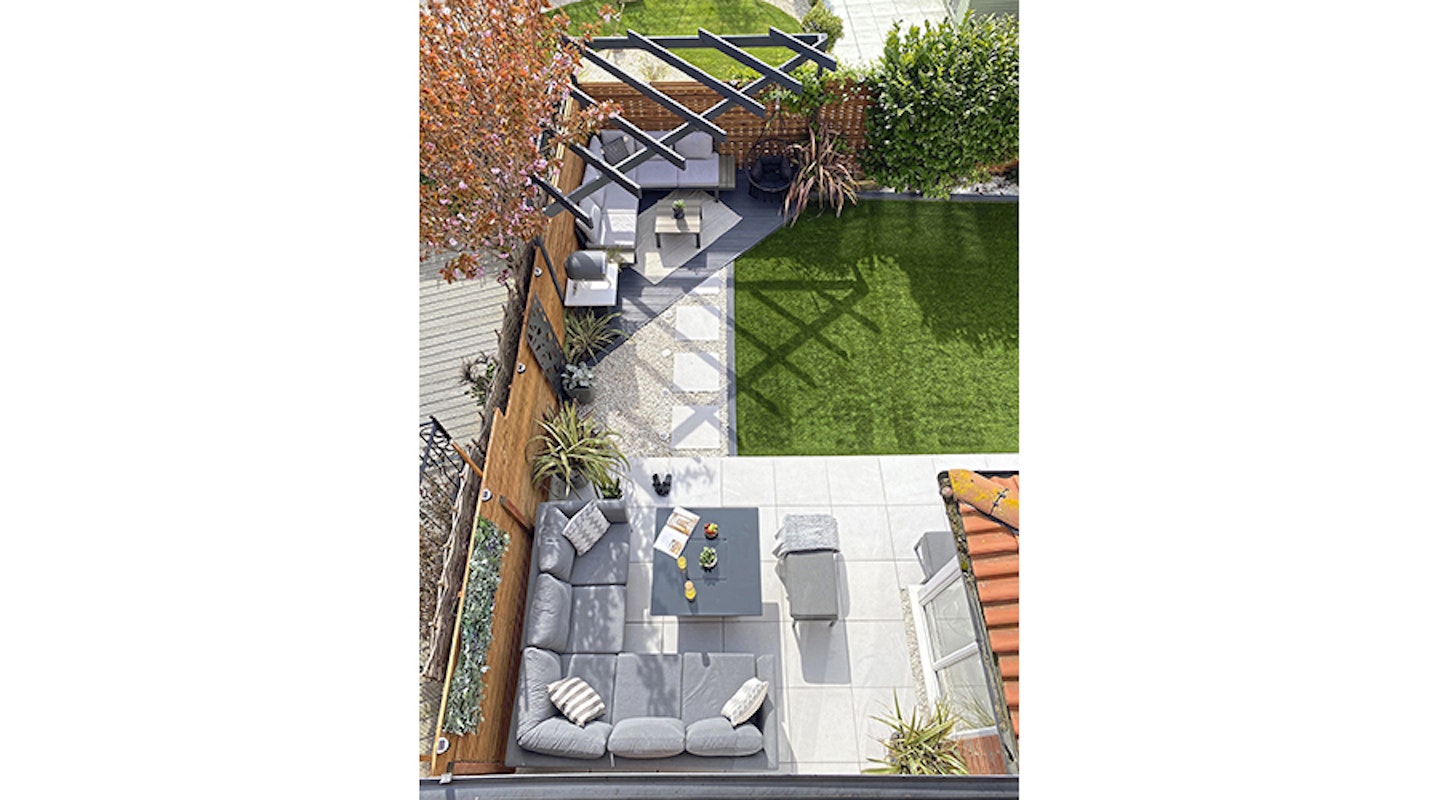
Ashley's Japandi garden plan
LOCATION Sunderland
THE LOOK Joyful Japandi
SITE Size 10m x 7m Faces South
Soil Clay
MY BUDGET
Turf lifter & skip hire £150
Aggregate for foundations £120
Soil £150
Decking £200
Timber for pergola & planter posts £180
Fencing £500
Concrete £50
Blocks & mortar for retaining wall & raised planter £150
Tiles £1,000
Tile adhesive, primer & grout £1,000
Render £350
Stone chippings £30
Turf £750
Furniture £1,000
Plants £1,000
Total: £6,630
HOW LONG IT TOOK
Removing old lawn 2 days
Creating split levels 4 days
Installing deck 2 days
Building pergola 2 days
Installing & staining fence 7 days
Patio & planter foundations 2 days
Laying patio 5 days
Rendering retaining wall & raised planter 2 days
Installing planter posts 1 day
Laying turf 3 days
Planting 3 days
Total: 33 days
What is Japandi style?
After moving to the newbuild detached 10 years ago, the couple felt frustrated by the garden’s layout. An impractical descending slope and lack of patio meant relaxing out there was tricky, and entertaining out of the question. In the early years Ashley added a few plants and paving slabs, but with young children and a now-much-missed family dog to contend with, a garden makeover was put on hold.
Fast forward almost a decade and Ashley was finally ready to embark on her dream DIY project. Taking an aerial photo of the garden from the newly extended loft window allowed her to visualise a layout. “I used my phone’s photo edit function to mark up where everything would sit,” she explains. “Having a bird’s eye view and drawing lines out electronically and to scale was really helpful.”
On Ashley’s wishlist was a corner seating arrangement in the sunny bottom lefthand corner, a pergola for shade and structural interest, and a decent-sized patio for entertaining, and to bring an inside-out feel. Style-wise, Ashley strove for a Japandi look, a blend of cosy Scandinavian and minimalist Japanese. “I love natural materials and interesting textures, and I’m also drawn to contemporary clean lines,” she explains. “My interior colour scheme is mostly white and neutrals with pops of black, and I wanted that to flow outside.”
Can you level a garden yourself?
If you're up for some less glamorous but crucial ground prep, then you can! Ashley was raring to go, ripping the old patio slabs and turf out, and landscaping the ground to create split levels. Working at weekends and evenings, alone and entirely by hand, she dug down to create a lower tier, and added two tonnes of topsoil for the patio foundations near the house.
Borrowing a heavy-duty whacker plate machine from a friend, she was able to compact the soil and achieve a perfectly flat base. “It was back-breaking work but whenever I had a wobble I just remembered how much I was saving,” recalls Ashley. “We were quoted £6,000 just to lay a patio, and that was the motivation I needed!”
Can I use fence posts for a pergola?
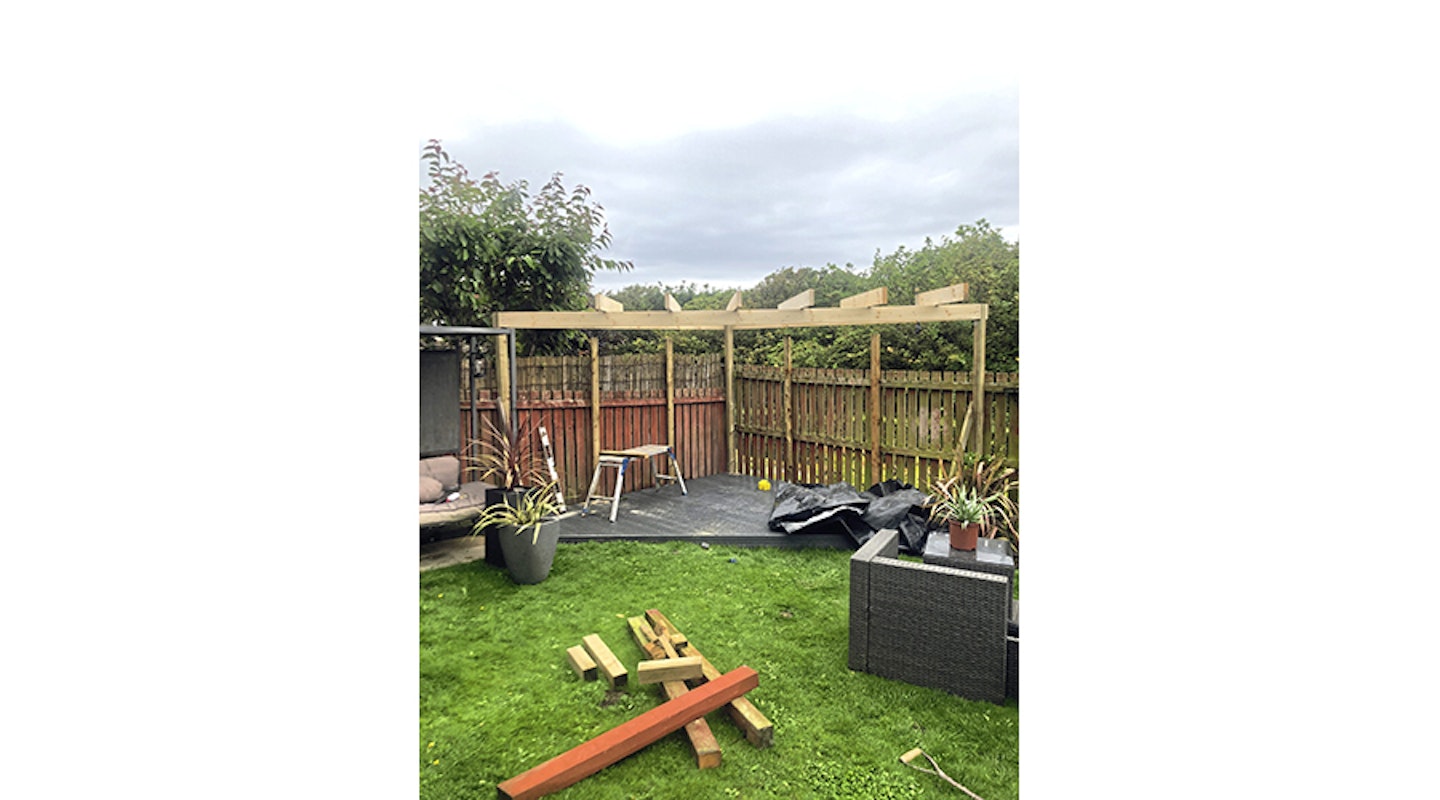
Self-confessed sun worshipper Ashley did! Her other priority as well as the patio was to create an elevated deck area complete with pergola in the brightest corner of the south-facing plot to accommodate her coveted sofa. To maximise space, she designed the deck in a triangle configuration and, to minimise labour, she called in a joiner to lay timber panels. She painted these with Cuprinol’s Urban Slate, complementing the anthracite windows of the loft conversion.
Visual interest and shade were created in this zone with the addition of a striking pergola, a lockdown DIY project that Ashley’s dad helped with. Typically, Ashley shunned flat-pack systems, instead designing her own structure inspired by photos she’d seen online, and to the deck’s exact dimensions. “It wasn’t too hard,” she says. “I cut three fenceposts to size and screwed them into place vertically alongside the fence. The trickiest part was attaching the decking joists to the top but that’s where Dad helped out. The end result was great; it adds a real focal point to the garden, and I love catching the late afternoon sun out there, lounging on the sofa.”
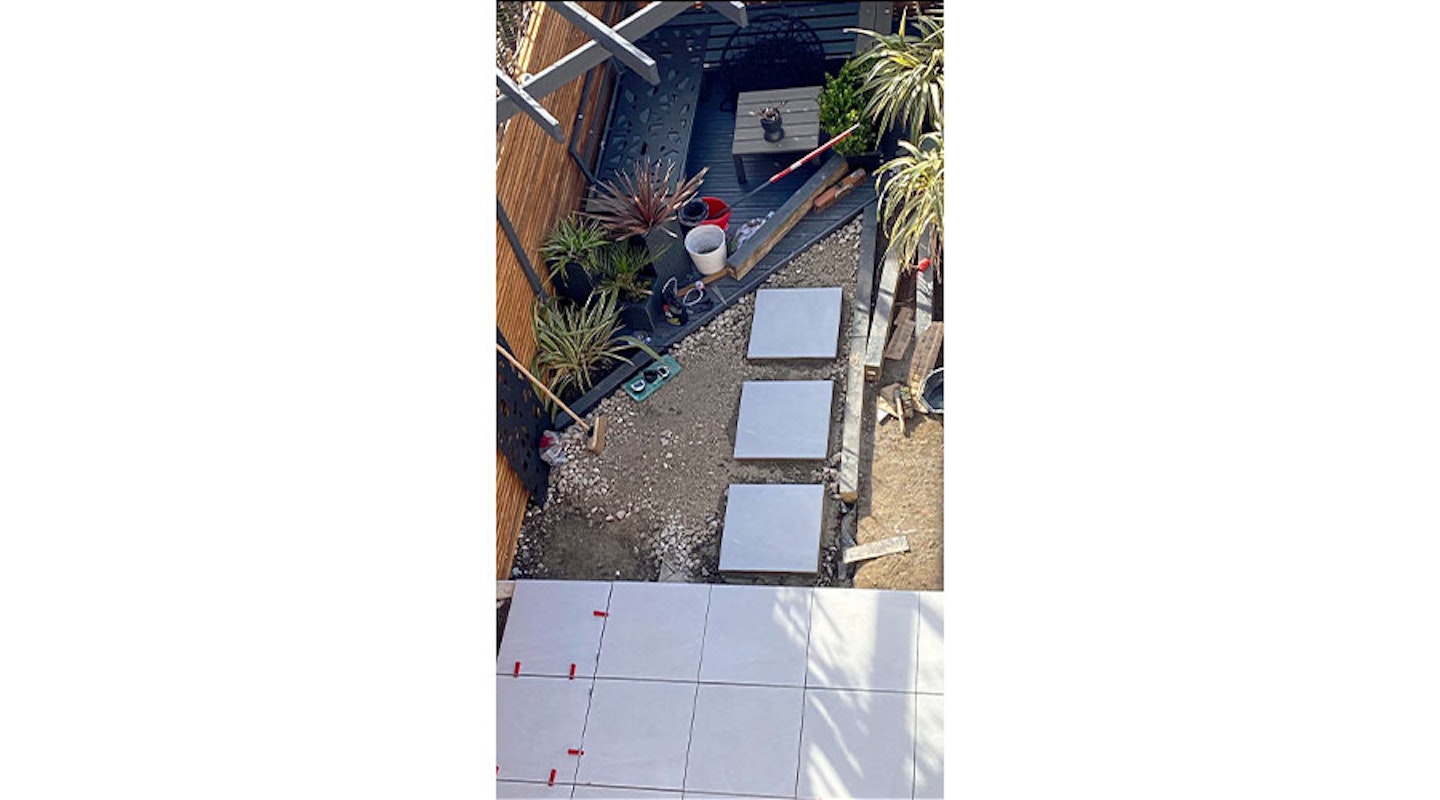
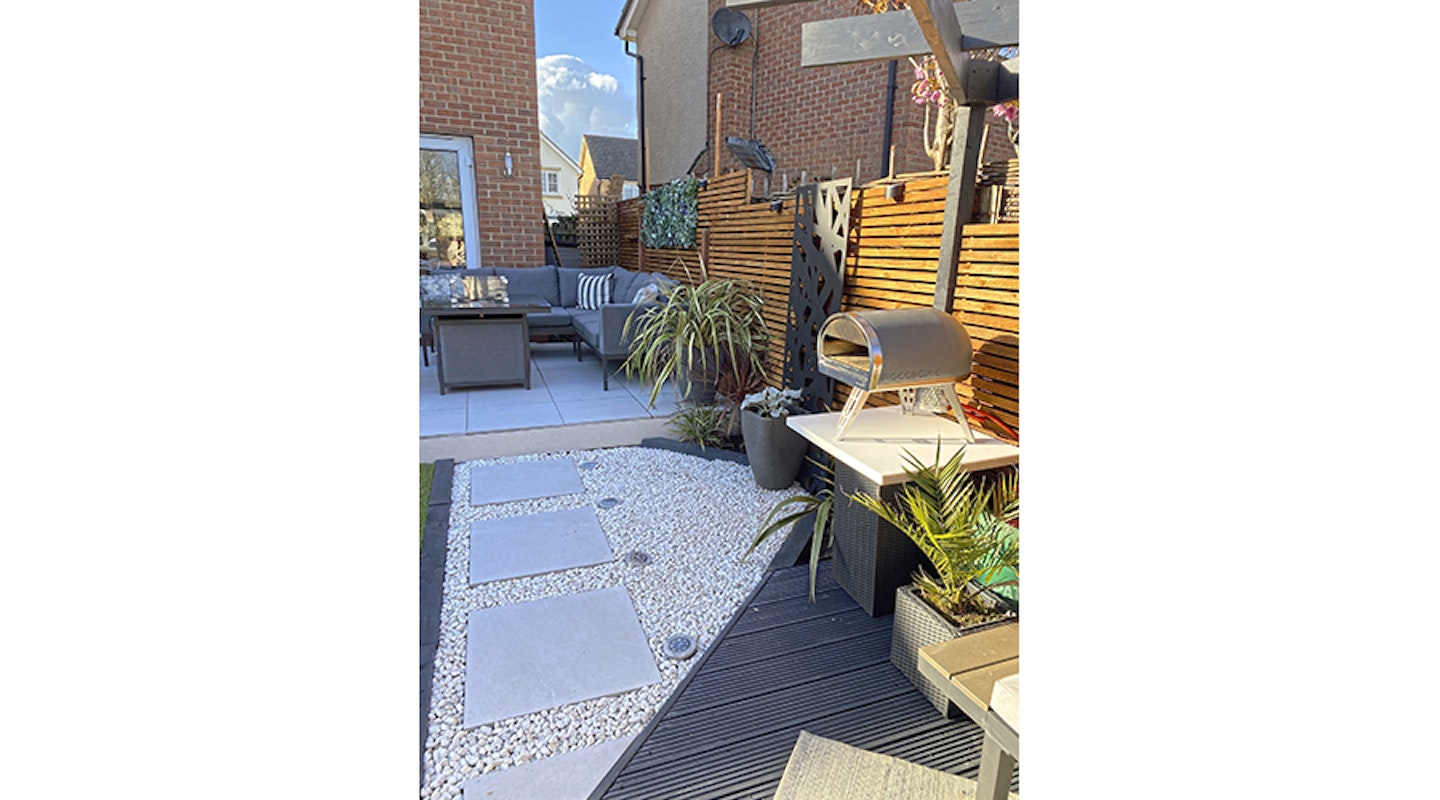
Contrasting white pebbles and stepping-stone slabs were laid in this area, creating a bridge effect from the patio to the deck, and adding texture. Meanwhile, cedar-effect horizontal fencing was cleverly fashioned from budget-friendly roofing batons bought direct from a timber merchant that Ashley stained with Osmo Cedar Oil. It replicates the real cedar cladding of the loft conversion, yet another link between house and garden.
Can you lay a patio yourself?
With a little help, it's possible. Although Ashely admits creating the elevated patio was the trickiest job of all and led even DIY-phobe Russell to get involved. Using sleepers and blockwork, the couple constructed a skeleton structure for a retaining wall, which also served as a step down to the lawn area. “It’s ironic, but many moons ago Russell trained as a bricklayer!” says Ashley. “To give him credit, he was great at helping me to lay the foundations, and he also gave me some useful hints,” she smiles
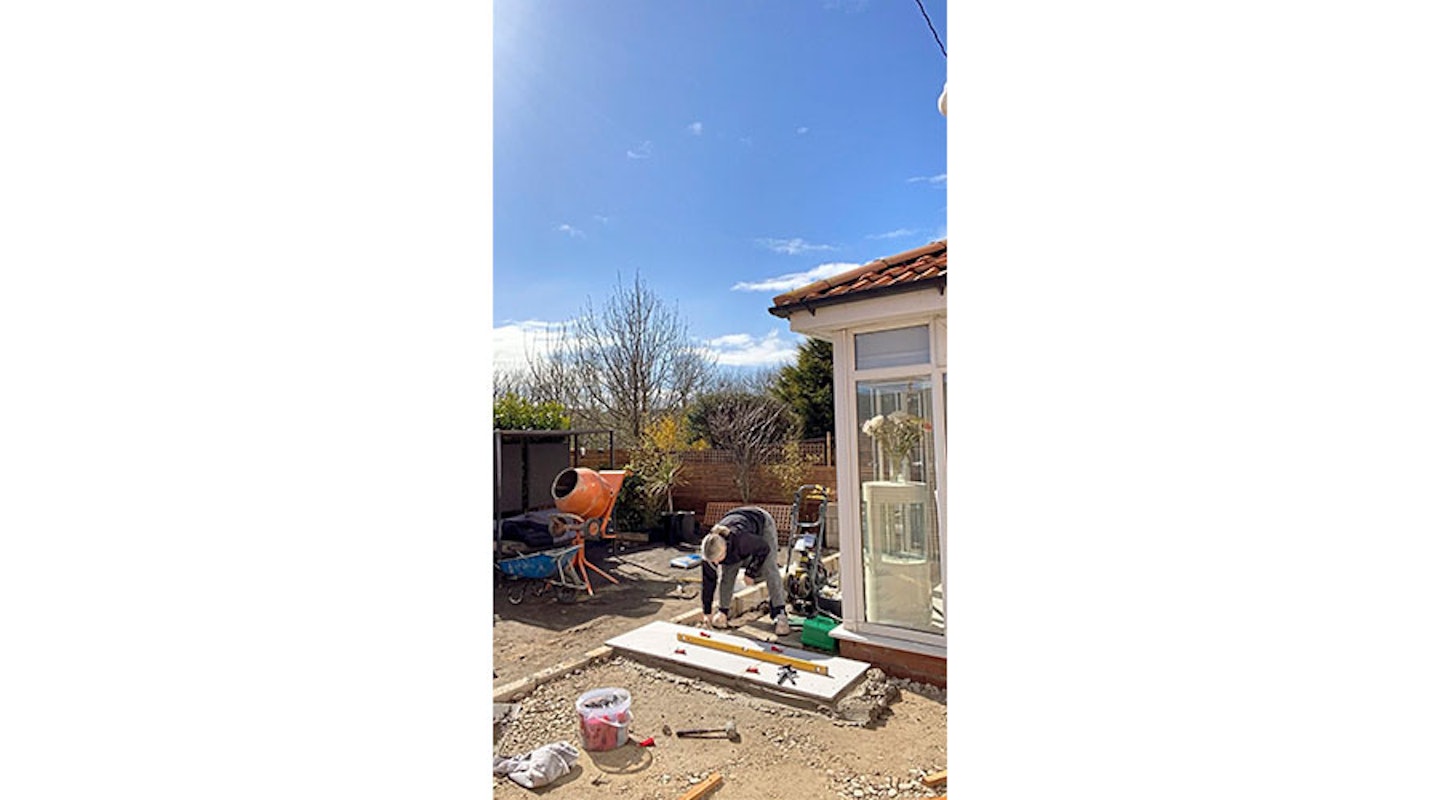
Those tips came in handy for Ashley’s next task, laying the slabs. Working with an off-grey porcelain that matched the kitchen flooring, she made mortar using a cement mixer borrowed from her dad. Once the tiles were down, Ashley set to work grouting them, before getting in a professional to render the step’s edge, as well as a connecting raised planter.
Japandi style plants
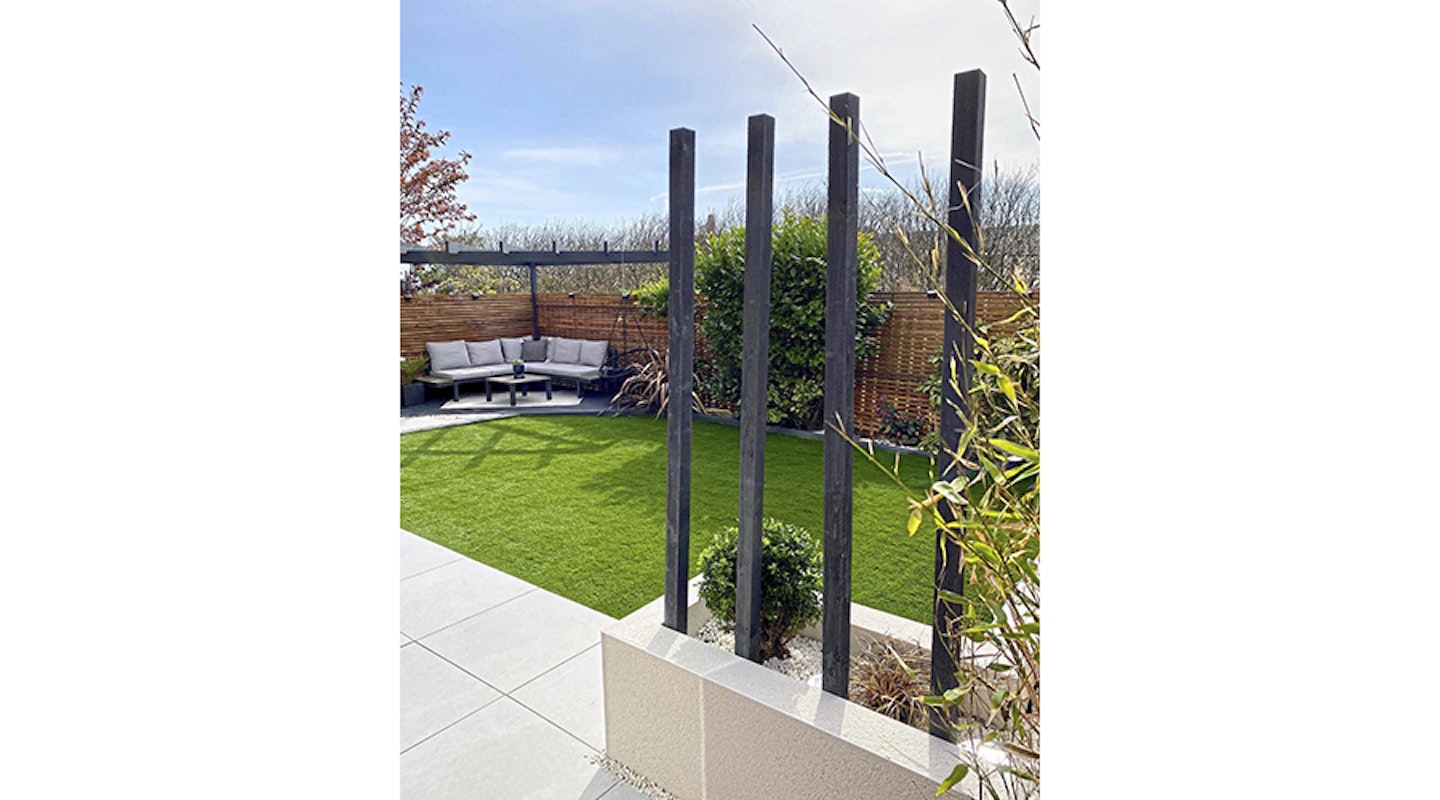
This striking structure was taken to the next level with five vertical fenceposts, creating both visual interest and privacy, while echoing the pergola opposite. Topiary box ball hedges in this spot add structure, while other architectural-style plants sit in pots and a back border. “I added New Zealand flax for more structure, and laurels and acers to screen and add colour,” adds Ashley. “Japanese-inspired plants like bamboo and black lace give an oriental feel, and I dotted ornamental grasses around to add interest to the ground.”
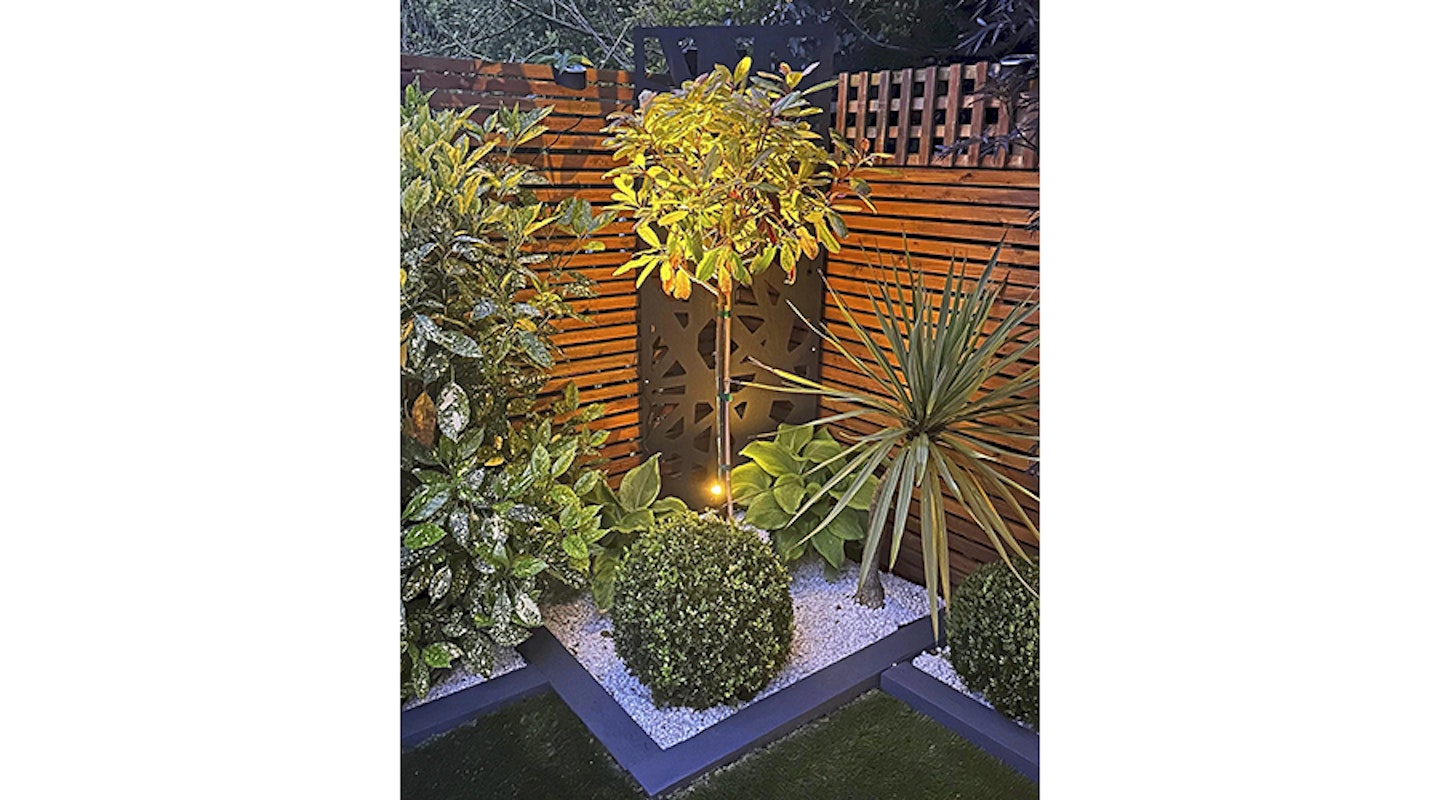
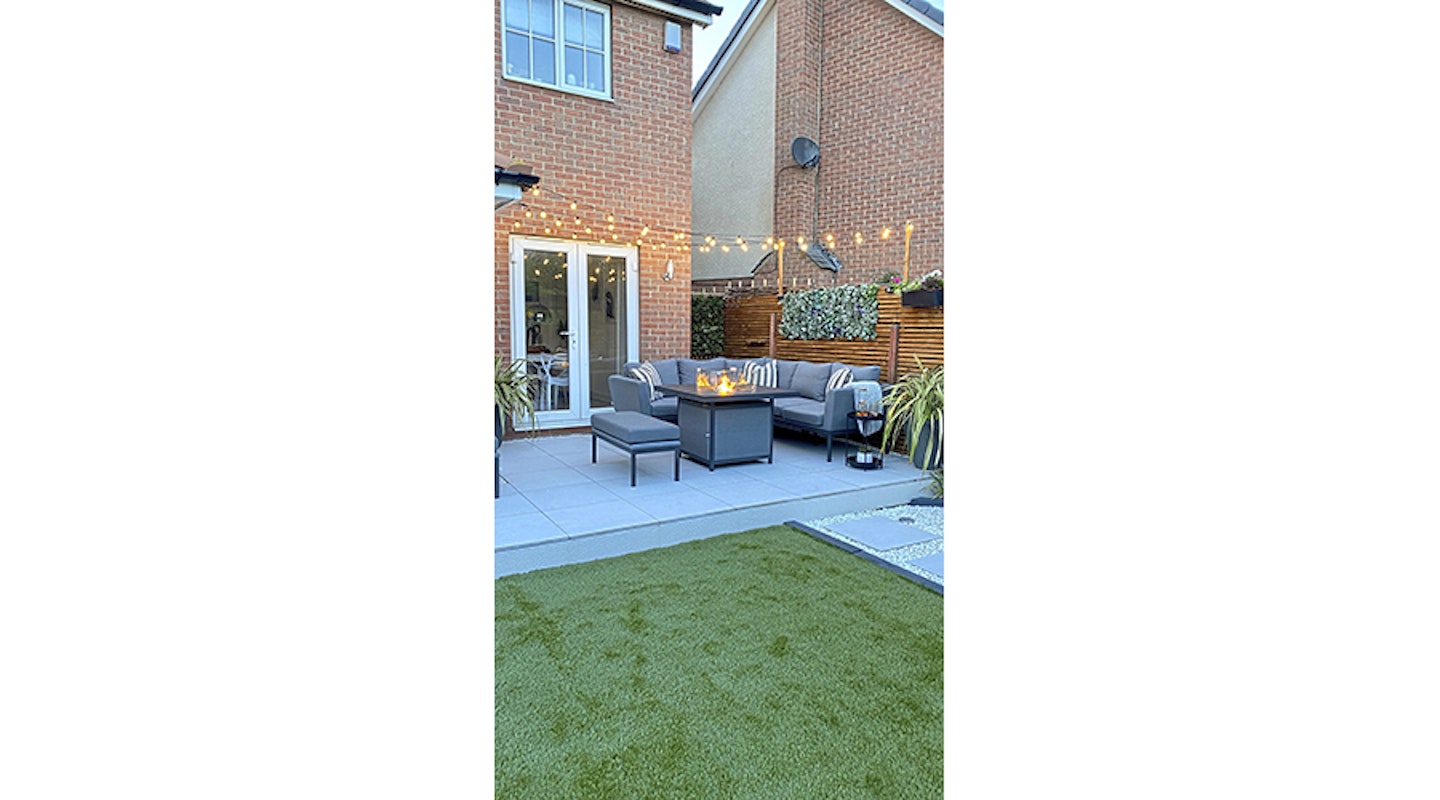
To break up the fence and add to the oriental vibes, decorative cut-out screen panels cast pretty shadows when the solar fence lights are lit. This gentle illumination is balanced with solar ground lights, as well as overhead festoon bulbs in the patio area, making for atmospheric dining on the chairs and gas-fired table.
Reflecting on her DIY labour of love, Ashley couldn’t be happier. “I’m proud of myself for getting stuck in and saving us so much money – even though I was cursing the odd time! Now it’s finished, I love curling up on the patio sofa with a coffee and a blanket, taking in all my hard work. We’re finally able to invite friends over too, and they’re always impressed with what I’ve been able to achieve. Doing everything yourself is so rewarding.”
How to start a Japandi style garden
Here's what Ashley did...
 1 of 4
After tonnes of topsoil and hours with a whacker plate, the sloping plot is level.
 2 of 4
The corner deck is in and the bespoke pergola starts to take shape.
 3 of 4
Ashley starts to lay the porcelain slabs, the concrete mixer gifted from her dad.
 4 of 4
With sleepers defining the space, a walkway links the patio to the deck.
Ashley's tips for a DIY Japandi makeover
✽ Ask friends and family if you can borrow equipment. A random conversation with a friend led to me borrowing his whacker plate, a neighbour lent me a wheelbarrow, and my dad let me have his cement mixer.
✽ Take your time with each job and don’t cut corners. I wish I’d taken more care laying the grass.
✽ As well as YouTube, lots of tradespeople film their work on TikTok so it’s worth having a browse. Search for hints and tips for the job you want to do, such as ‘how to lay turf’.
✽ Check and check again that you’ve ordered enough materials for each task. I misjudged the amount of mortar I’d need for the tiles, and running out set me back a good couple of weeks. You can always return unopened bags.
We’re awarding Ashley a big thumbs up for creating such a snazzy space without splashing the cash
 1 of 10
Lunch al fresco? It’s a pizza cake with the Gozney Roccbox oven.
 2 of 10
Dreary dark evenings don’t exist in this plot! And with solar lights, no electrician is required!
 3 of 10
All hacked out, it’s time to chill with a much-deserved glass of bubbly.
 4 of 10
Bulldog Binks in full-on nap mode.
 5 of 10
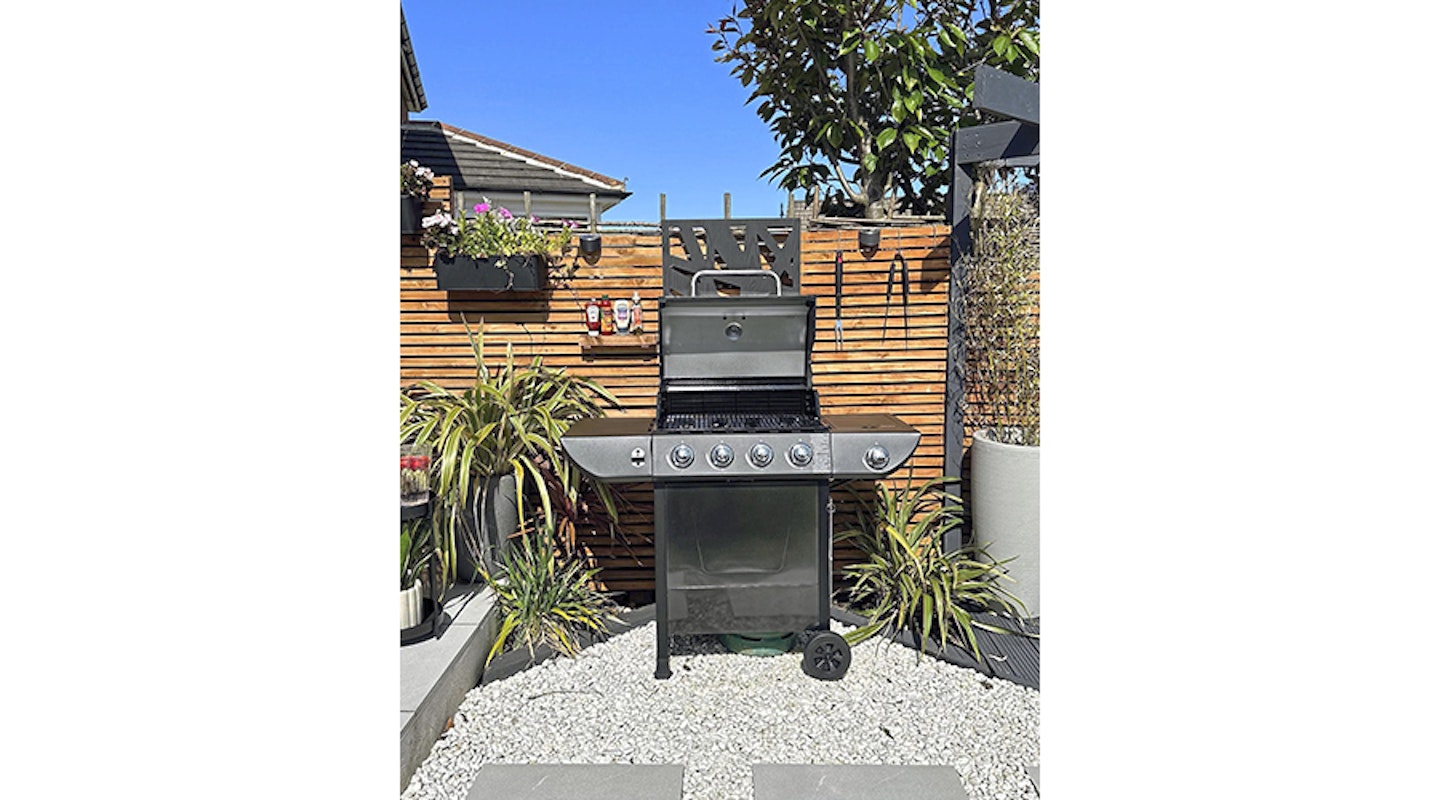
Impromptu bbqs are a breeze with everything hooked up and ready to go.
 6 of 10
A view to be proud of while lapping up the evening rays under the pergola.
 7 of 10
A sculpture made of fenceposts? Yes please!
 8 of 10
The sound of a DIY water feature made from a firepit for under £30 is so much sweeter!
 9 of 10
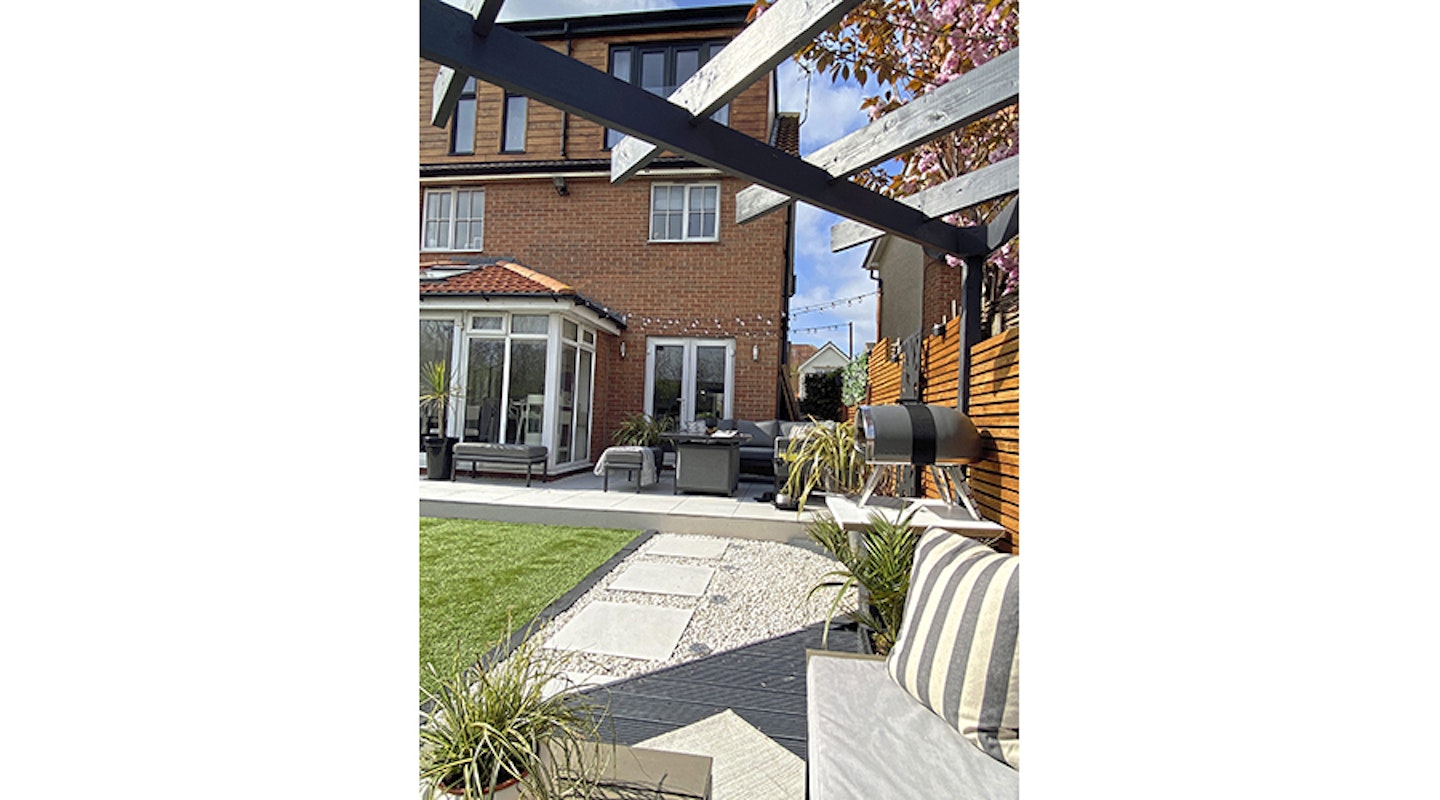
Sun’s out, Asda cushions are out!
 10 of 10
A firepit table and festoons warm the patio space.
Smart ideas to steal for a Japandi style garden
✽ Cheat a slatted fence by covering yours with roofer’s batons.
✽ Build a bespoke pergola with fence posts and decking joists.
✽ Create a canopy of festoons over a seating area.
Get hack happy with Ashley on Insta @east_shore_home
What to read next
Make the most out of your outdoor space with a Modern Gardens Subscription
Discover everything you need to know to make your outside space look fantastic, quickly and easily, with hundreds of simple ideas, designer tricks, affordable products and expert advice with a Modern Gardens Subscription. Find out more about the benefits of being a Member now.

